
We have an adorable building here on the farm that sits right behind our house – a smokehouse that we built in 2009. Growing up, my family also had a smokehouse in our yard, not far outside the front door. It was a small brick structure and the door had long been missing. My parents called it a smokehouse, but it was never really used to smoke anything. The sole purpose of the “smokehouse” was to burn things…garbage, boxes, etc. Burning garbage is definitely not environmentally friendly and is considered acceptable these days, but that is how things rolled back in the seventies.
Jesse started talking about building a smokehouse soon after we bought the farm in 2000. He starting researching how to build a smokehouse, relying primarily on a little pamphlet from Storey’s publishing. After a lot of research and sketches, he came up with a design. He turned his vision into a reality in 2009.
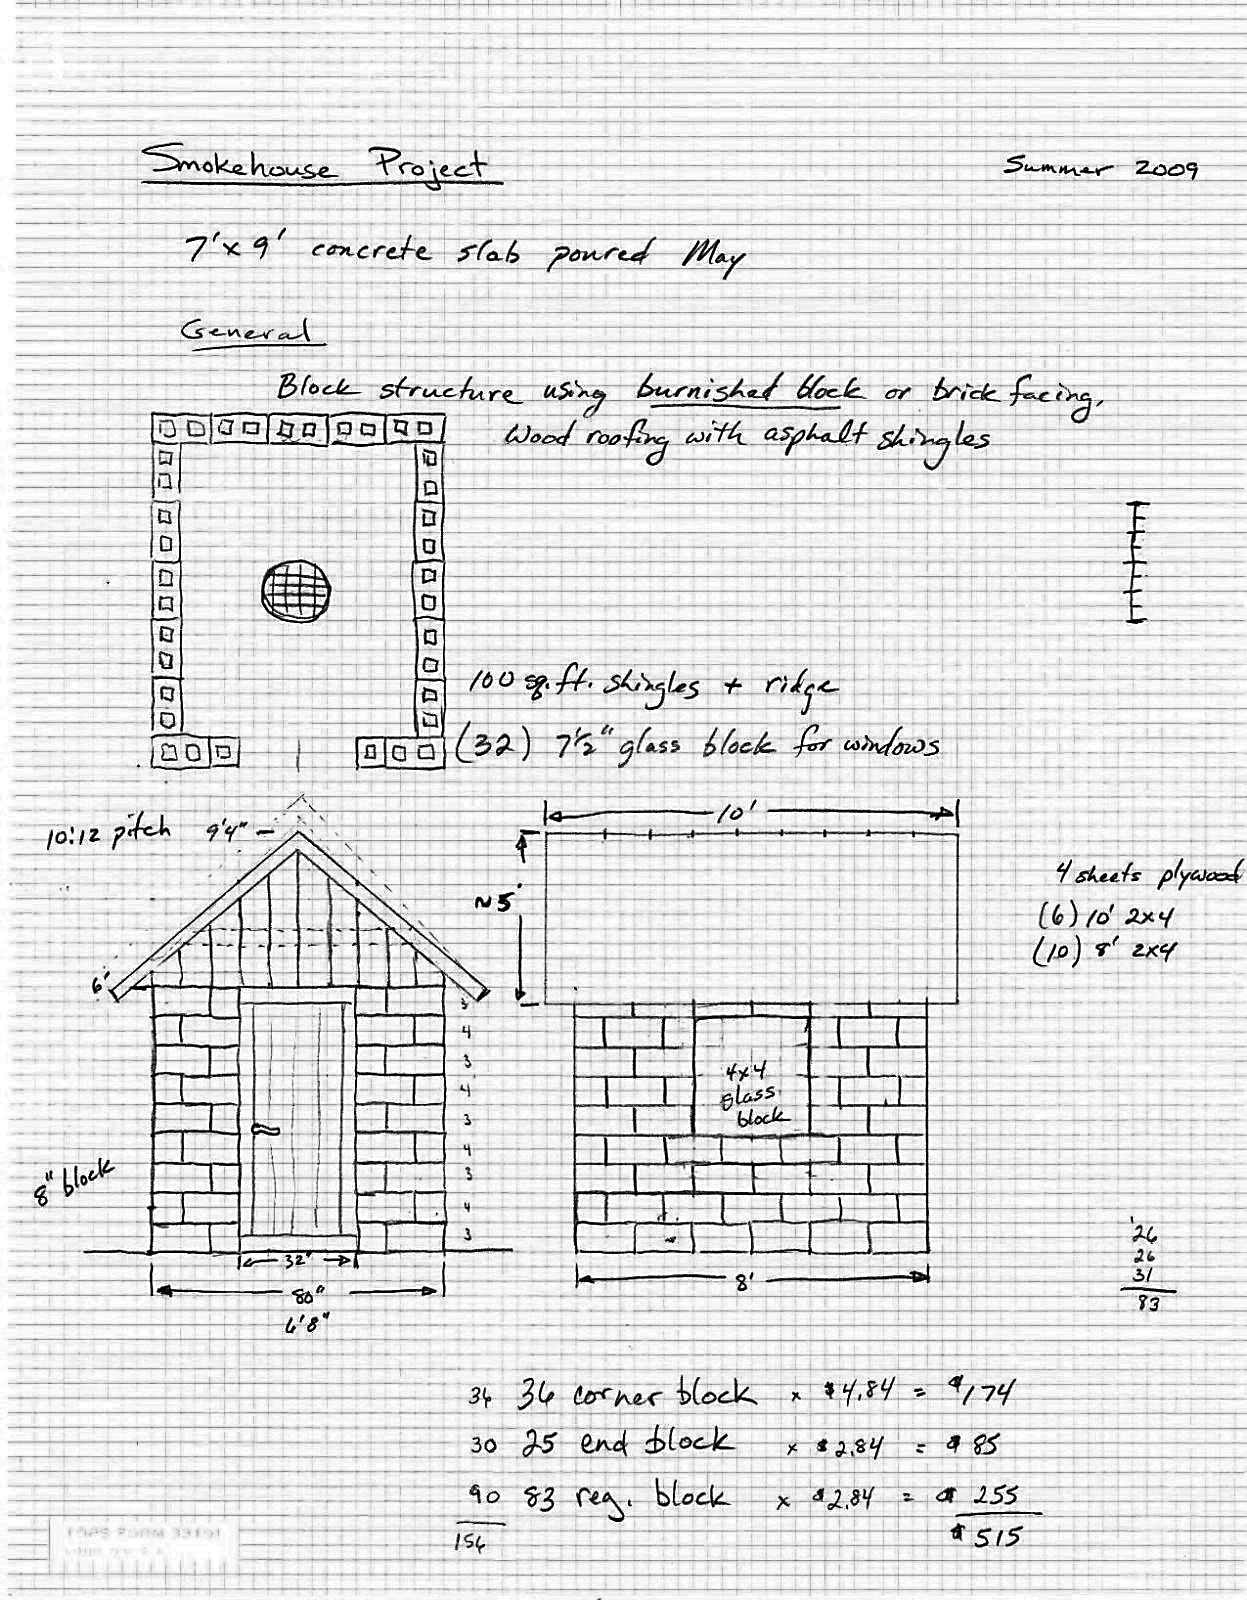
Smokehouse Design Sketch
Jesse already had a barrel smoker for hot-smoking or cook-smoking, but what he really wanted was a cold-smoker for smoking pork sausage in the tradition from his grandfather’s farm. Several other cold smoked products are also absolutely delicious: salmon, hams, cheese, nuts, and various sausages.
Cold-Smoking
The art of cold-smoking is to keep the meat or fish below 70 degrees F to inhibit bacteria growth and to not cook the meat product. For instance, if you would like smoked venison sausage, but don’t want to eat the complete deer all at once (who would….?), then cold-smoking will impart the desired smoke flavor while also retaining the fat inside the sausage to prevent it from becoming dry and hard. Toss cold-smoked venison sausage into the freezer until you are ready to cook it for another tasty meal.
Another one of our favorites is to cold-smoke 5 to 10 racks of baby back pork ribs, wrap them in freezer paper and toss them into the freezer. We take them out of the freezer at some later date, bake them in the oven for a couple of hours and have some of the best ribs ever!
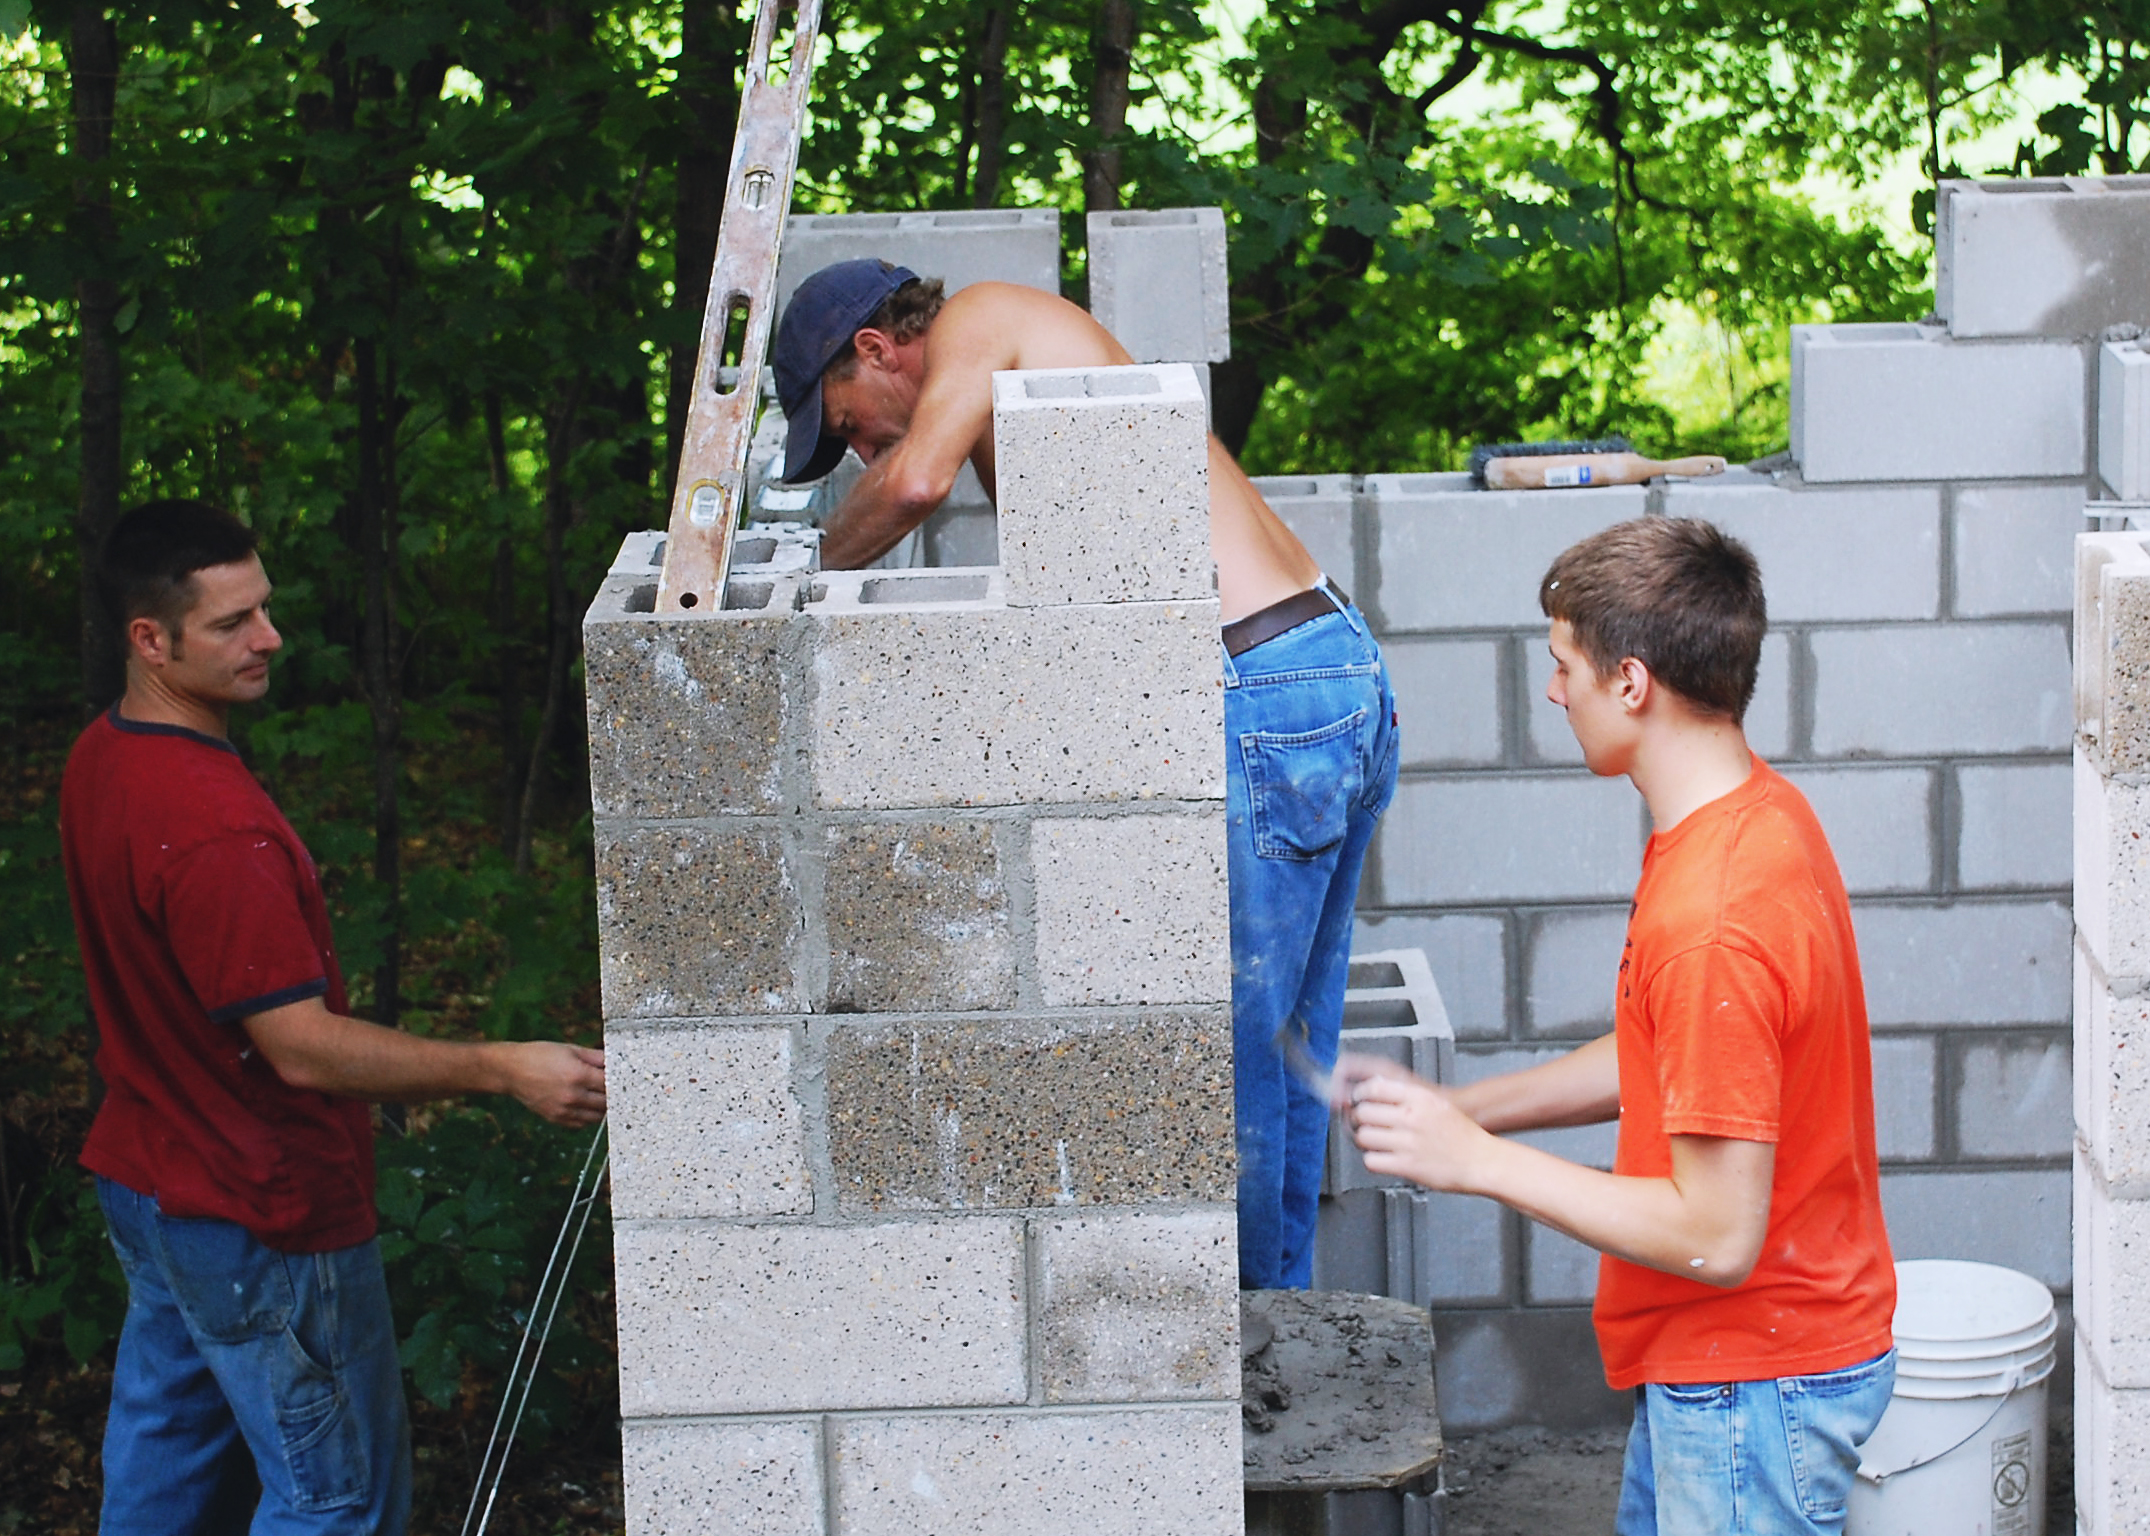
Construction
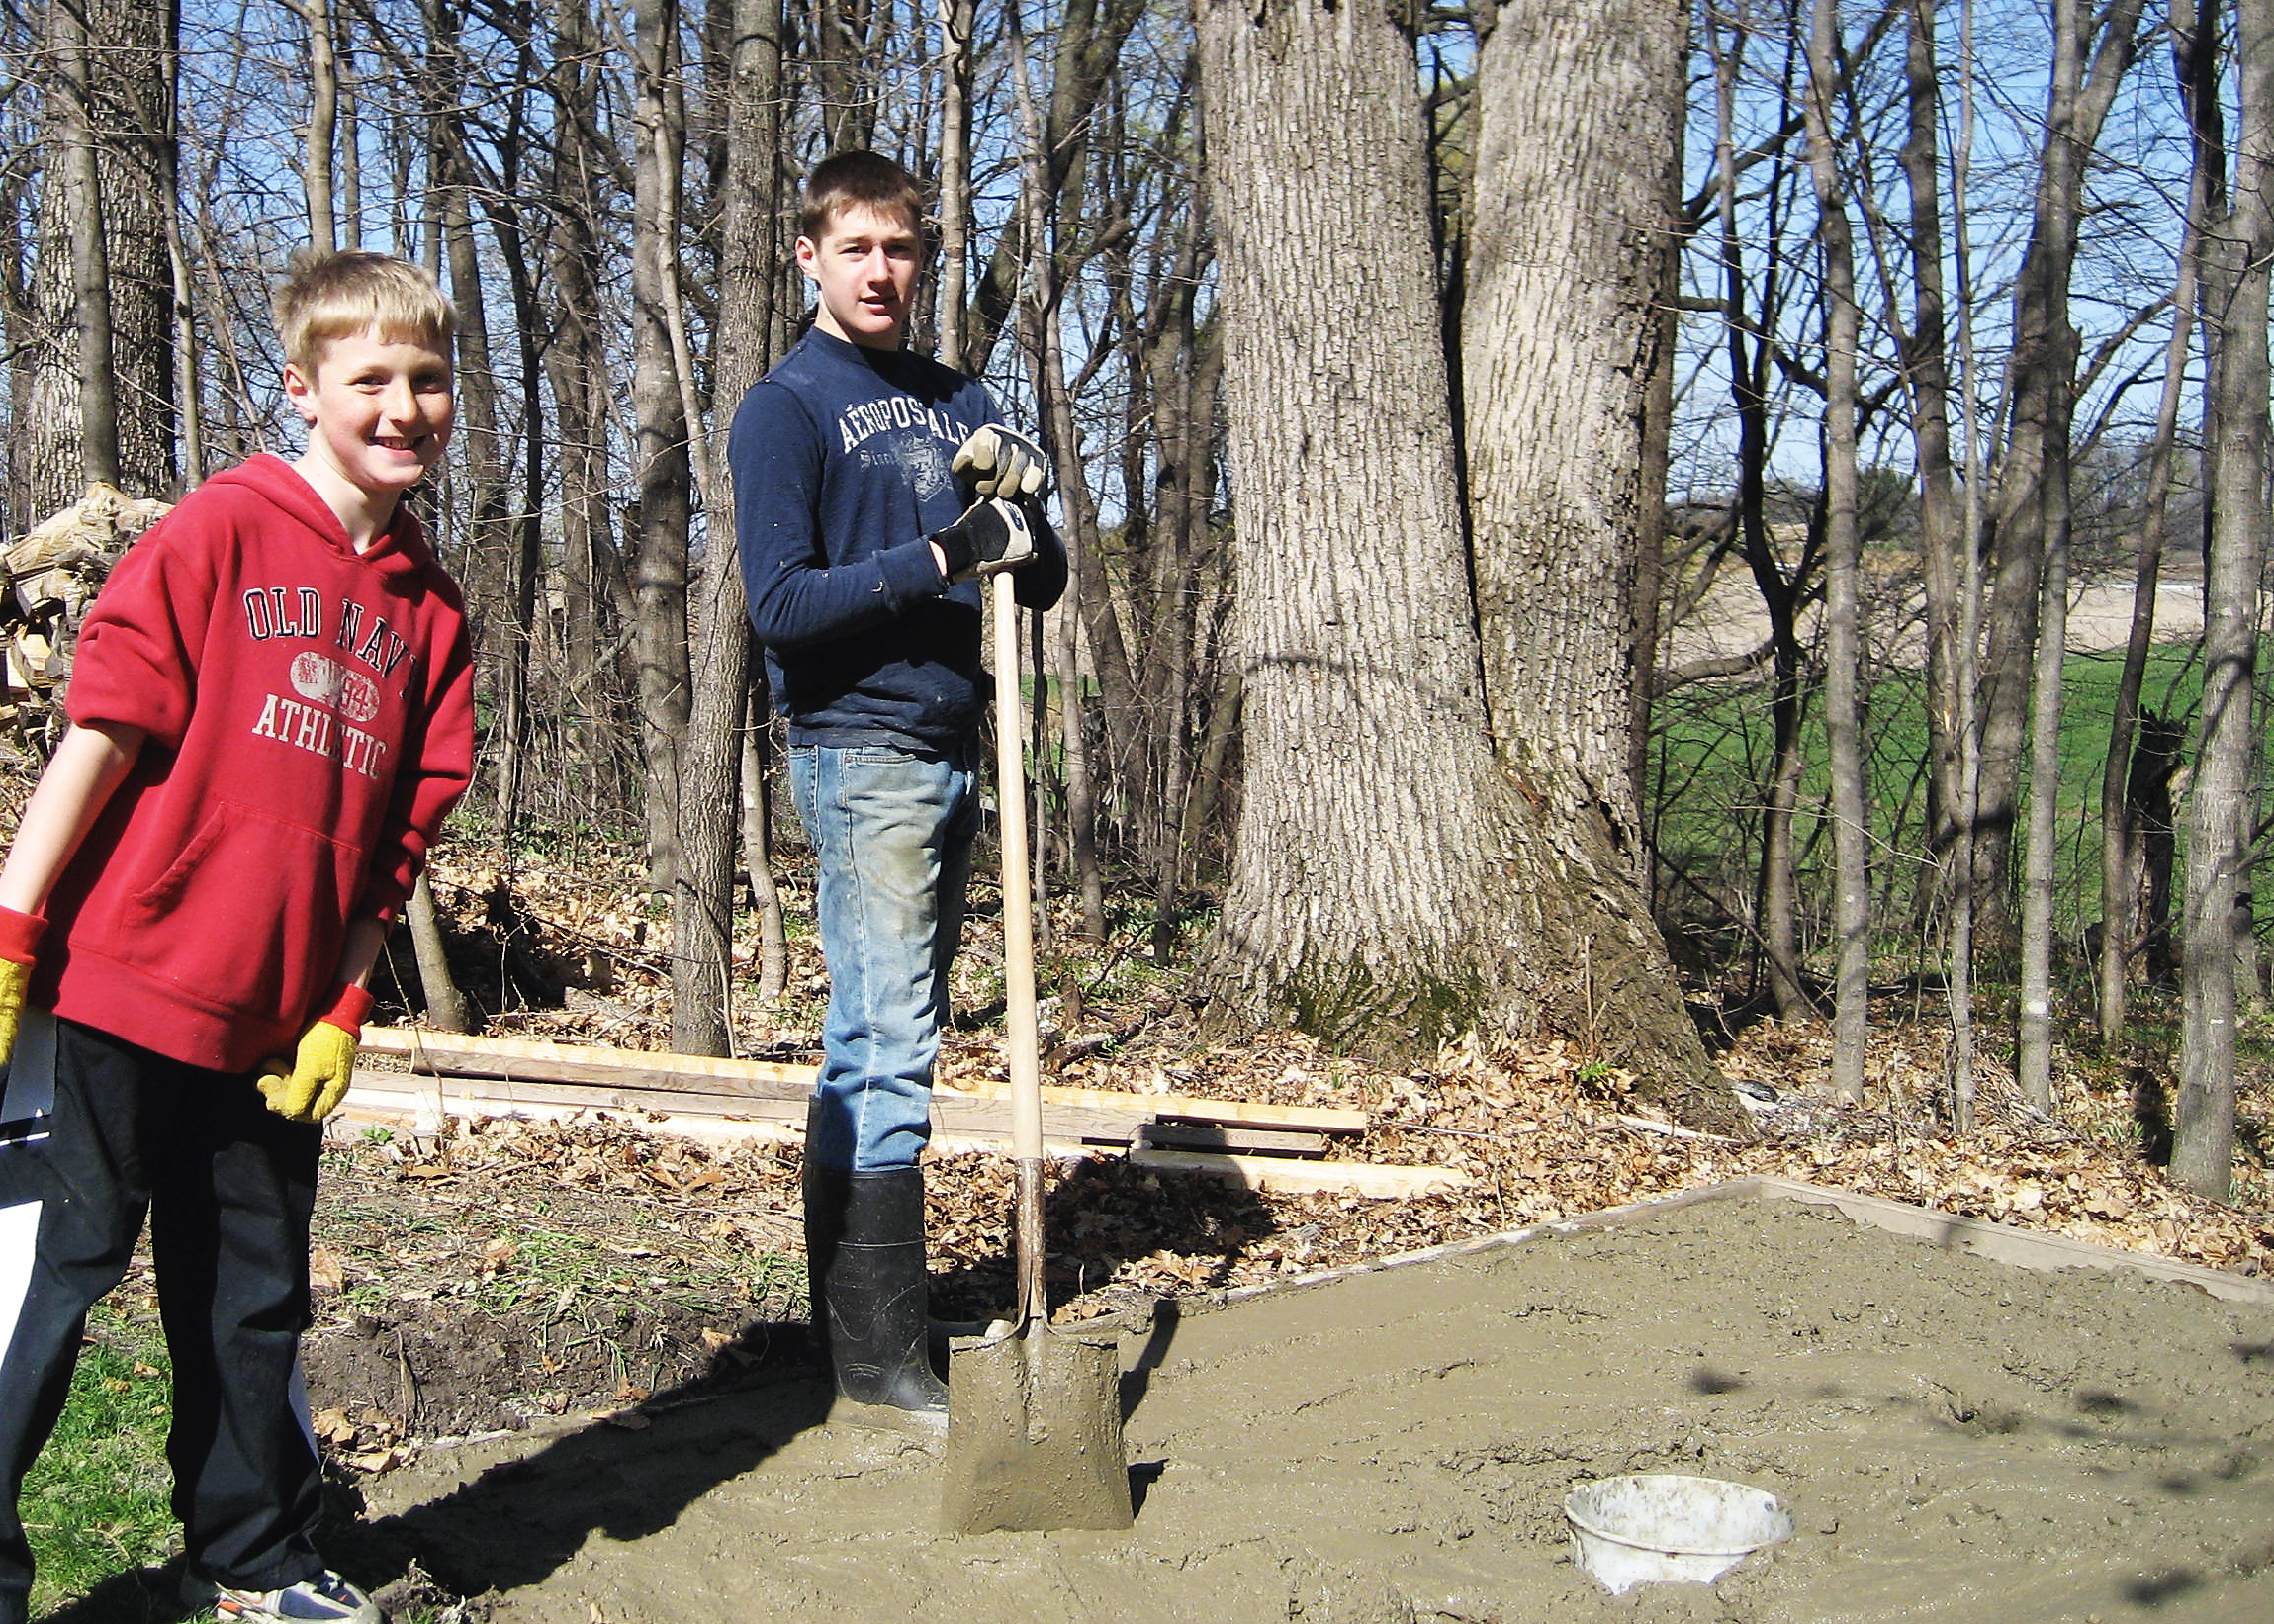
The concrete slab was poured in the spring of 2009. Our boys learned about mixing, pouring, and finishing cement. The 5 gallon bucket in the middle of the slab is where the smoke enters the smokehouse. The slab is what is called a “floating” slab. There is no frost footings below the slab, it is simply framed to have a 10 x 10 inch “curb” around the outside of the slab and the rest of the slab is 4 inches thick. There is also reinforcing rebar in the curb and criss-crossed across the slab. After a decade of freezing and thawing, there are still no signs of cracking or shifting.
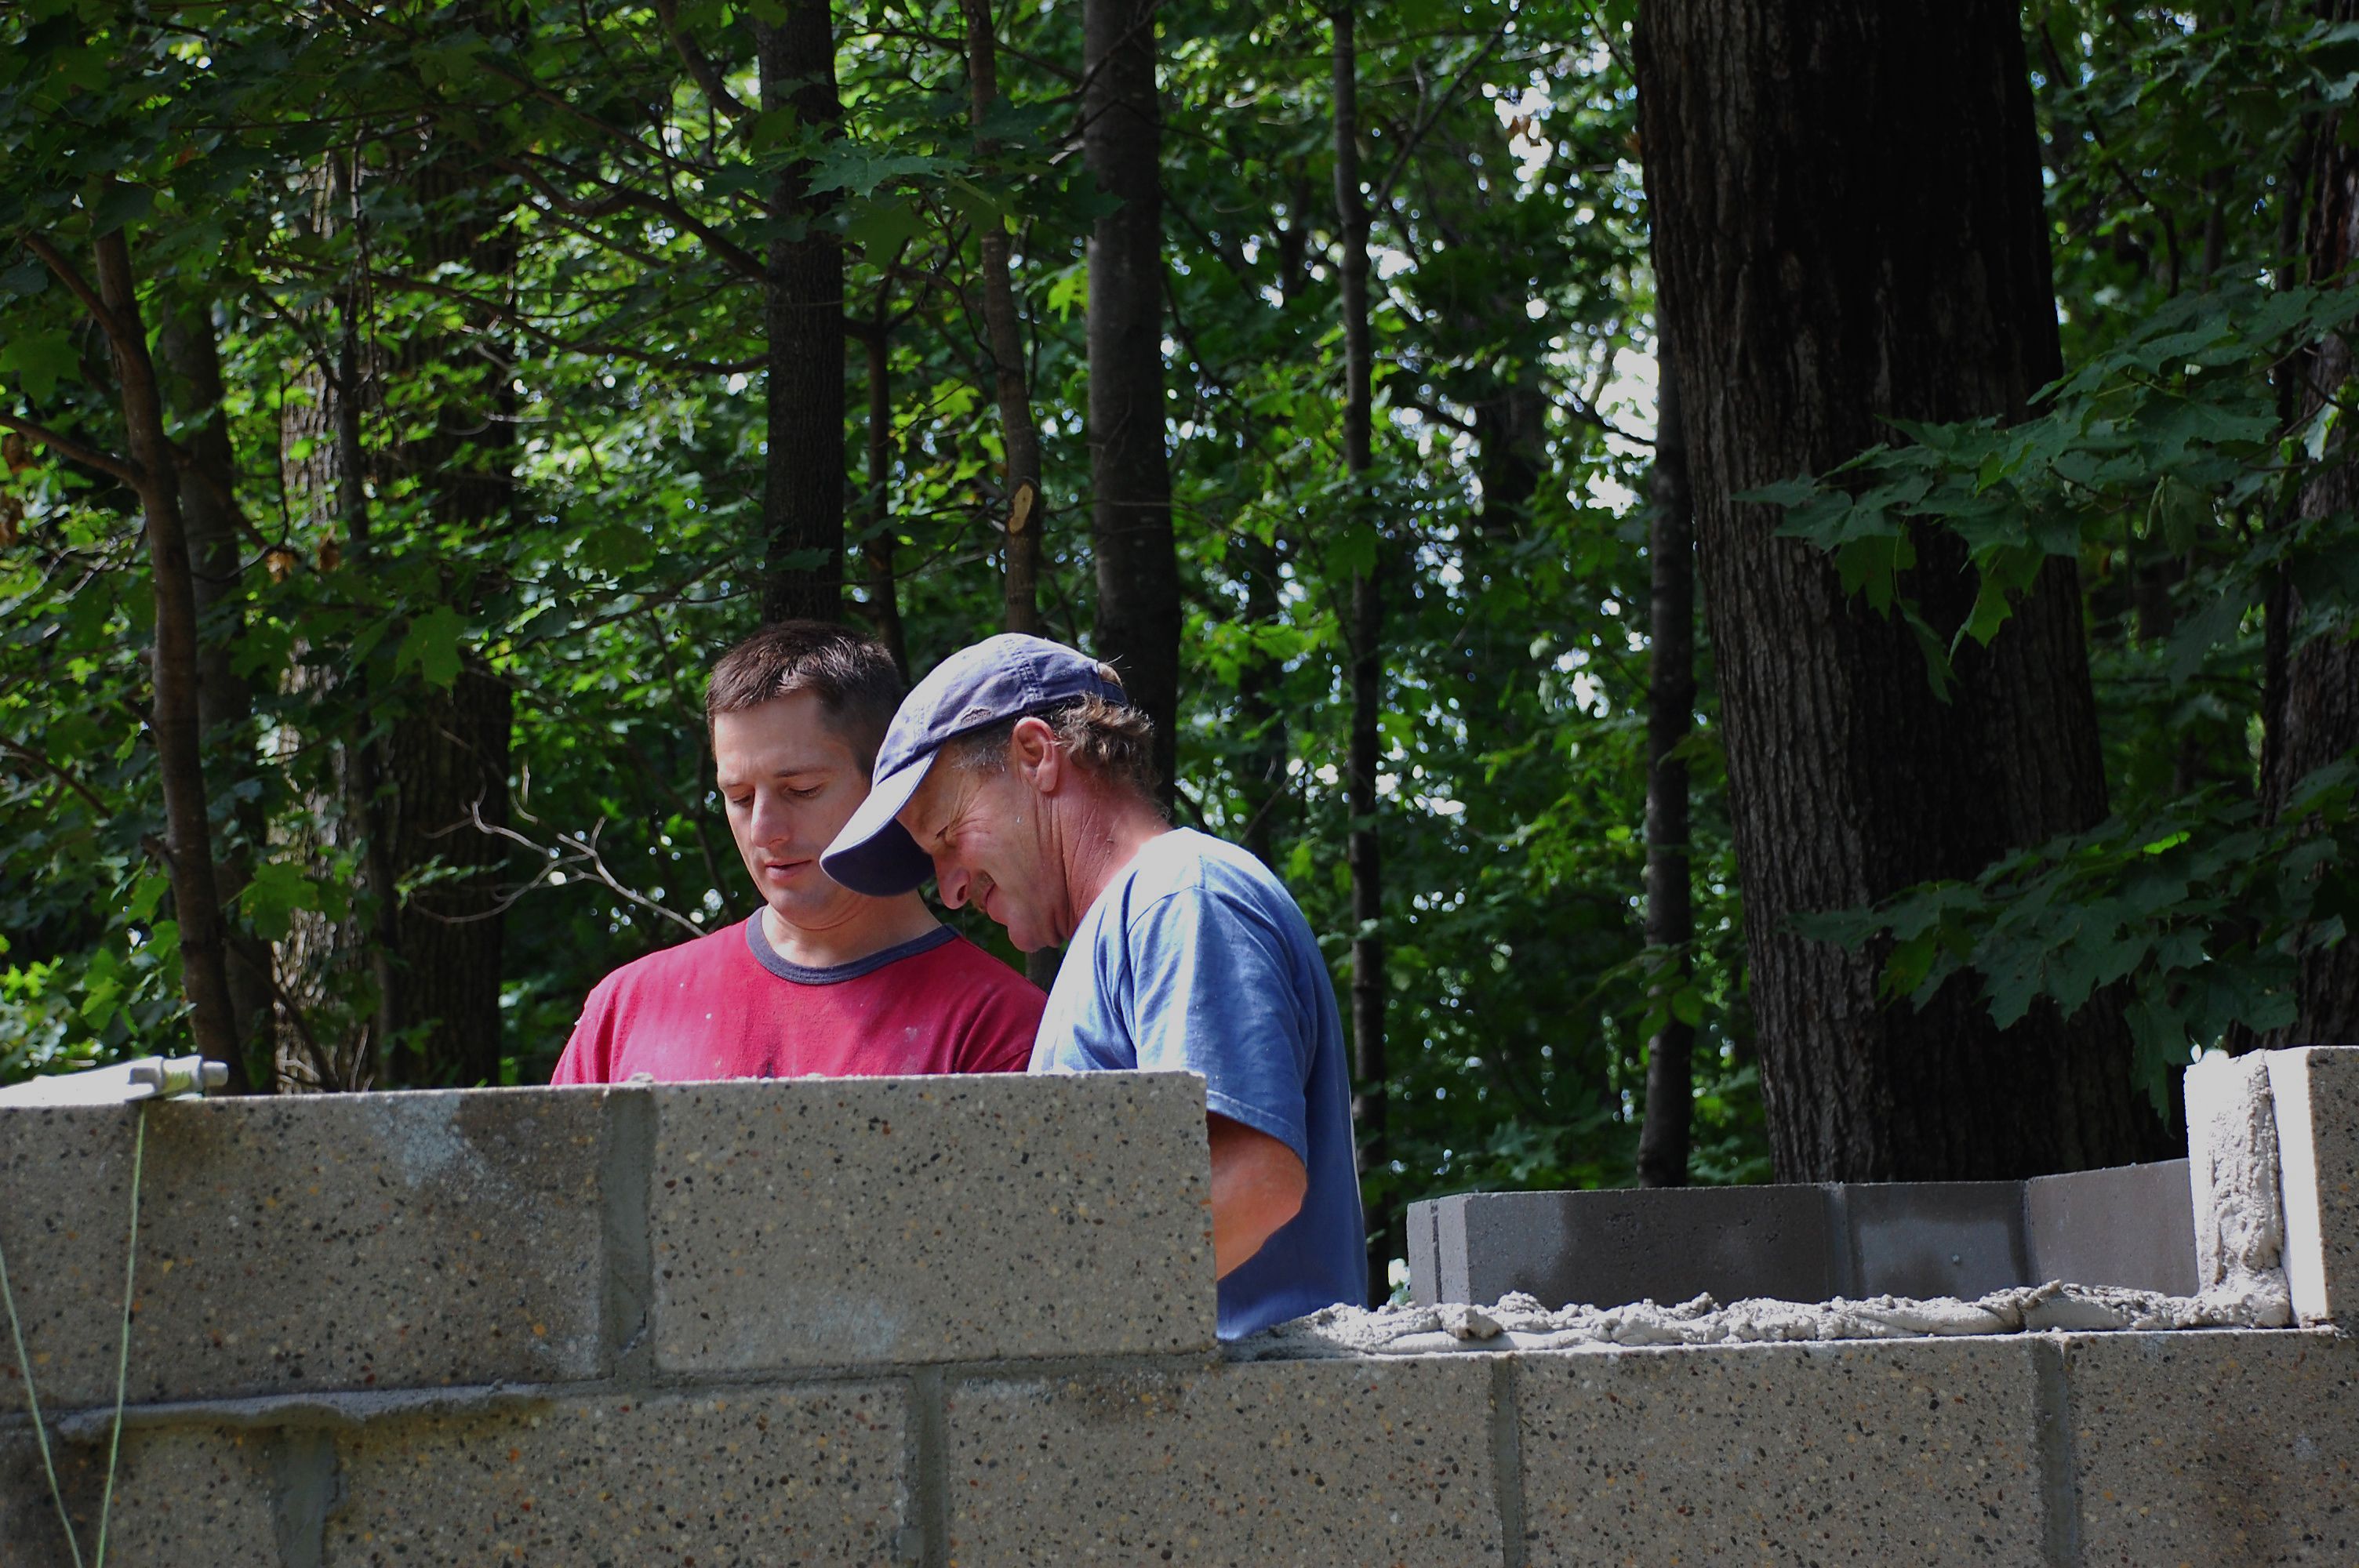
Jesse’s uncle, a mason by profession, came over to help in building the smokehouse. His skills amazed us as he tossed just the right amount of the mud in just the right place.
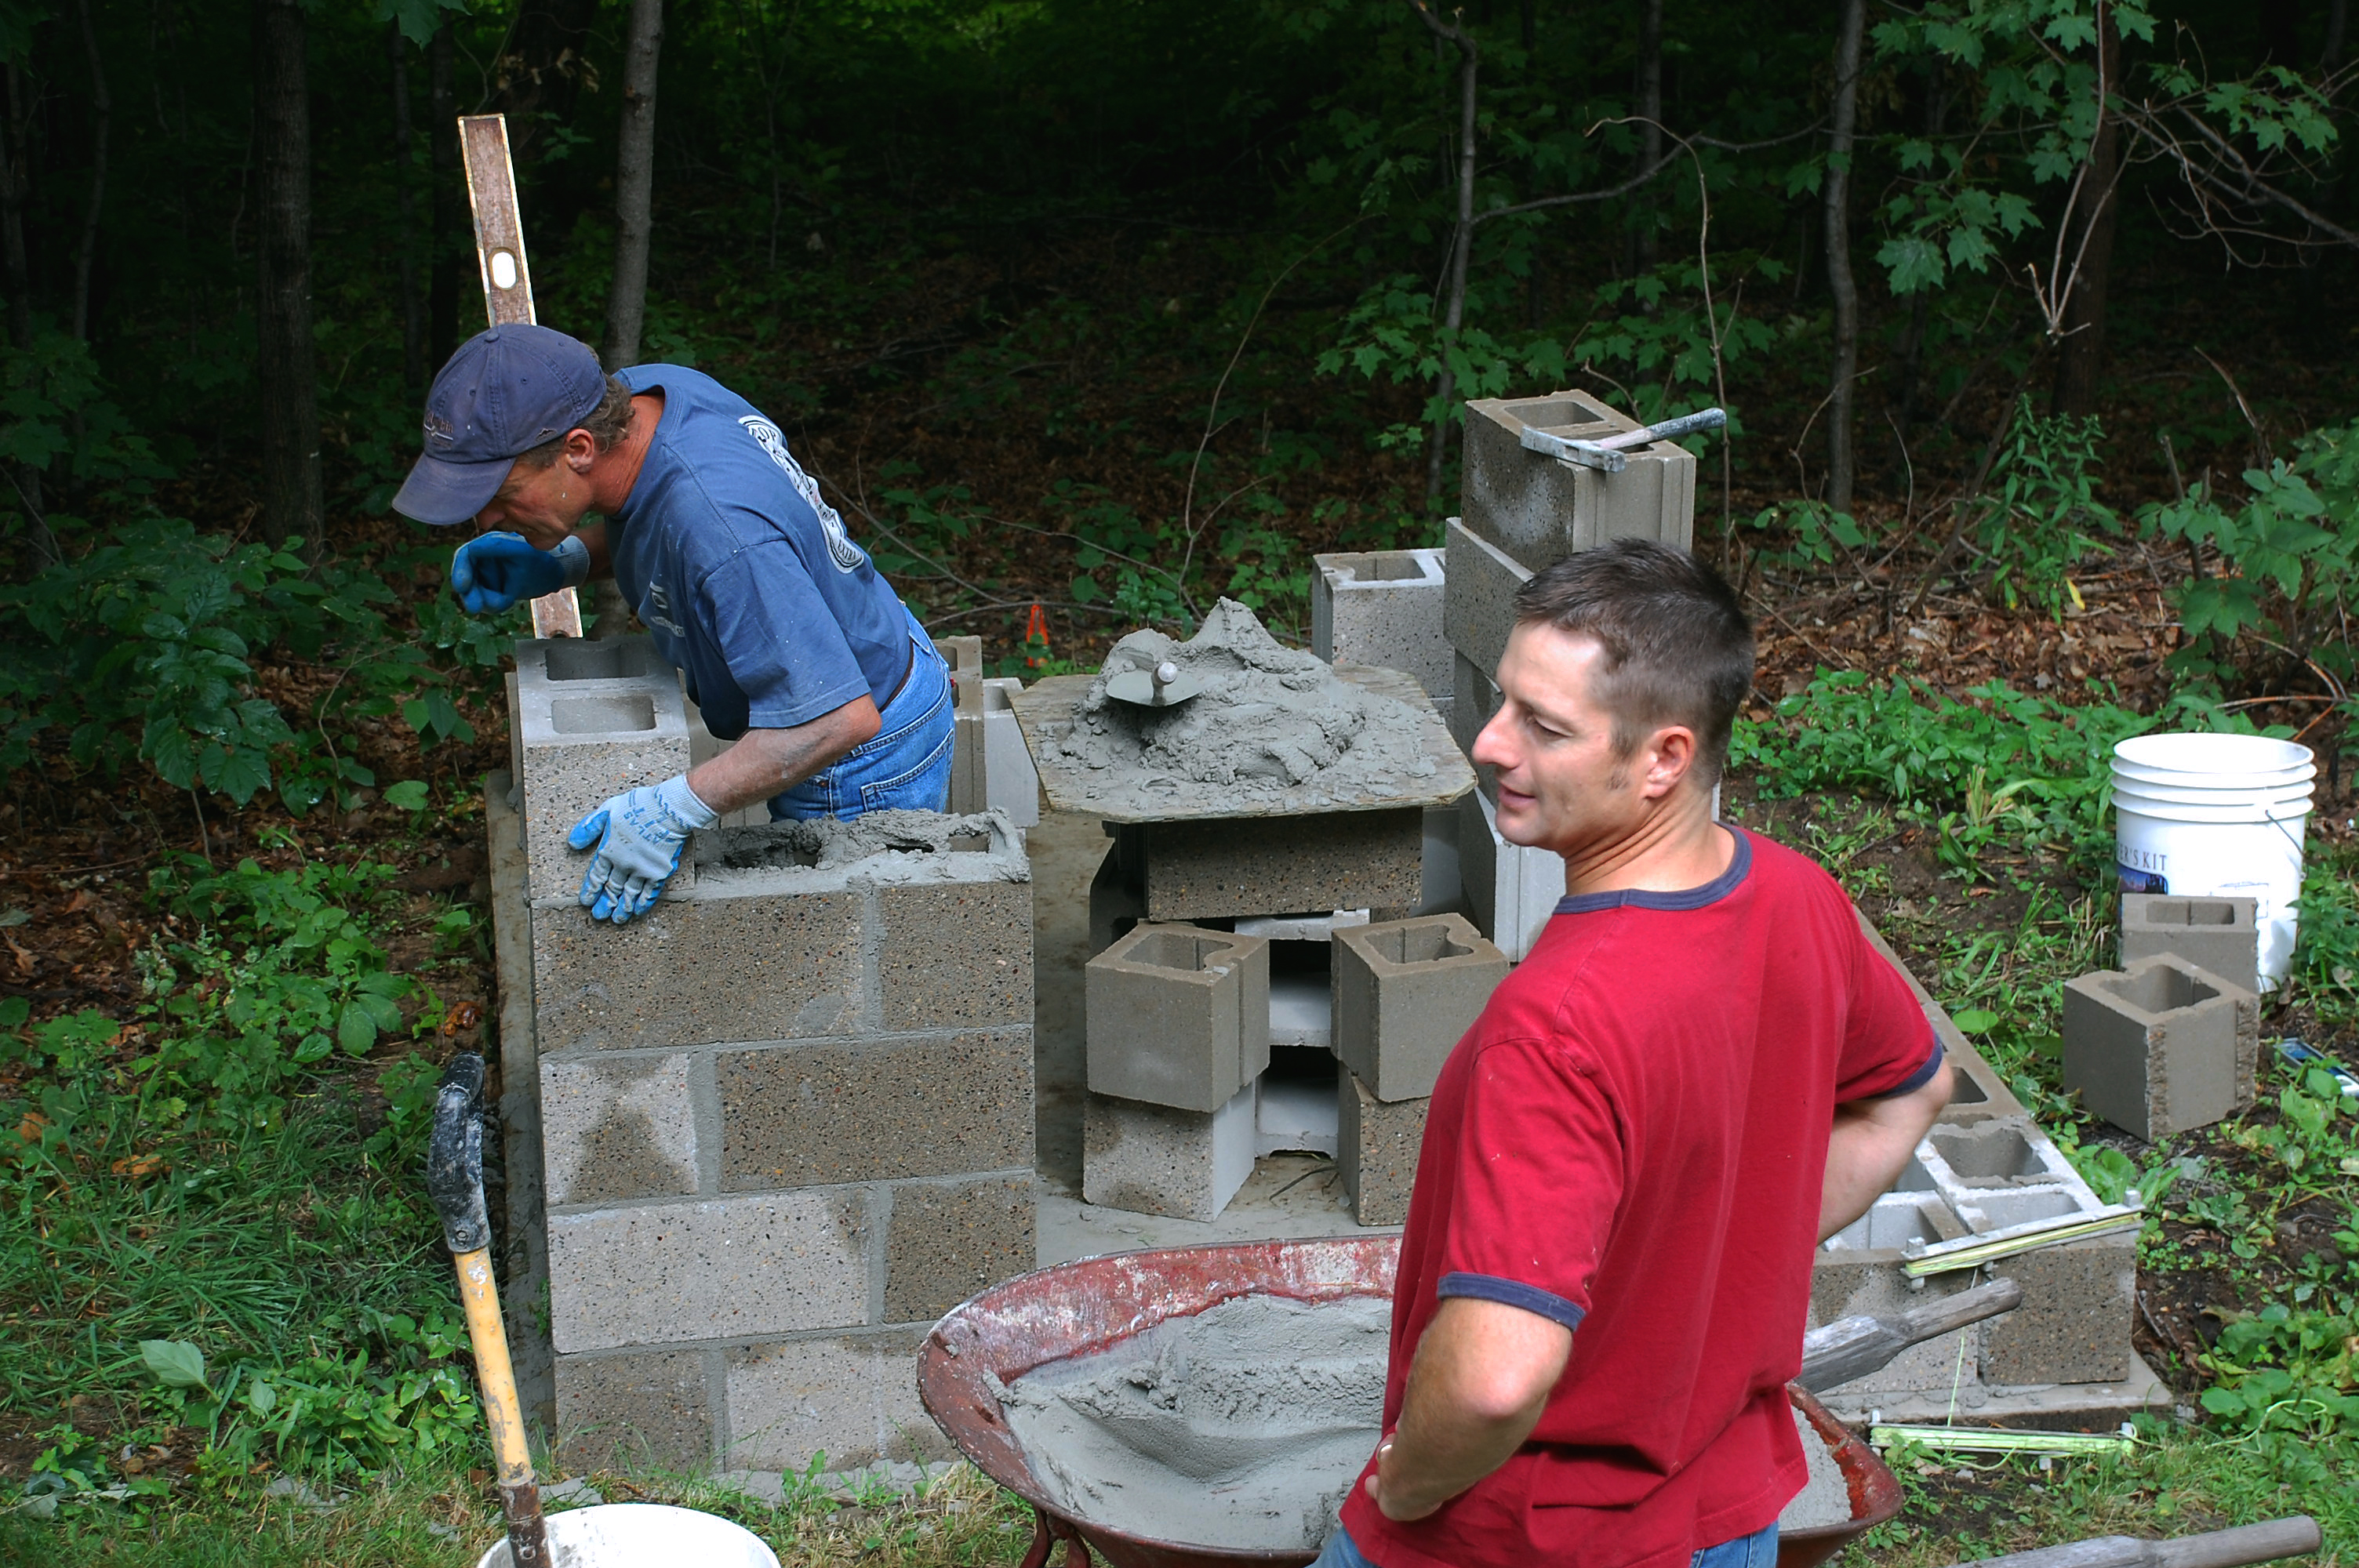
The smokehouse was designed to have glass block windows to allow in natural light. Laying the glass block was the most time-consuming part of the block laying process and the expertise of Jesse’s uncle was definitely necessary to get the glass blocks set just right. Our son worked on smoothing the joints between the blocks.
After the blocks were cured, the guys went to work building roof trusses, sheeting the roof, and laying shingles. Jesse decided to build the trusses so that the rafters could be used for hanging meat, so they are about 6 ft. high.
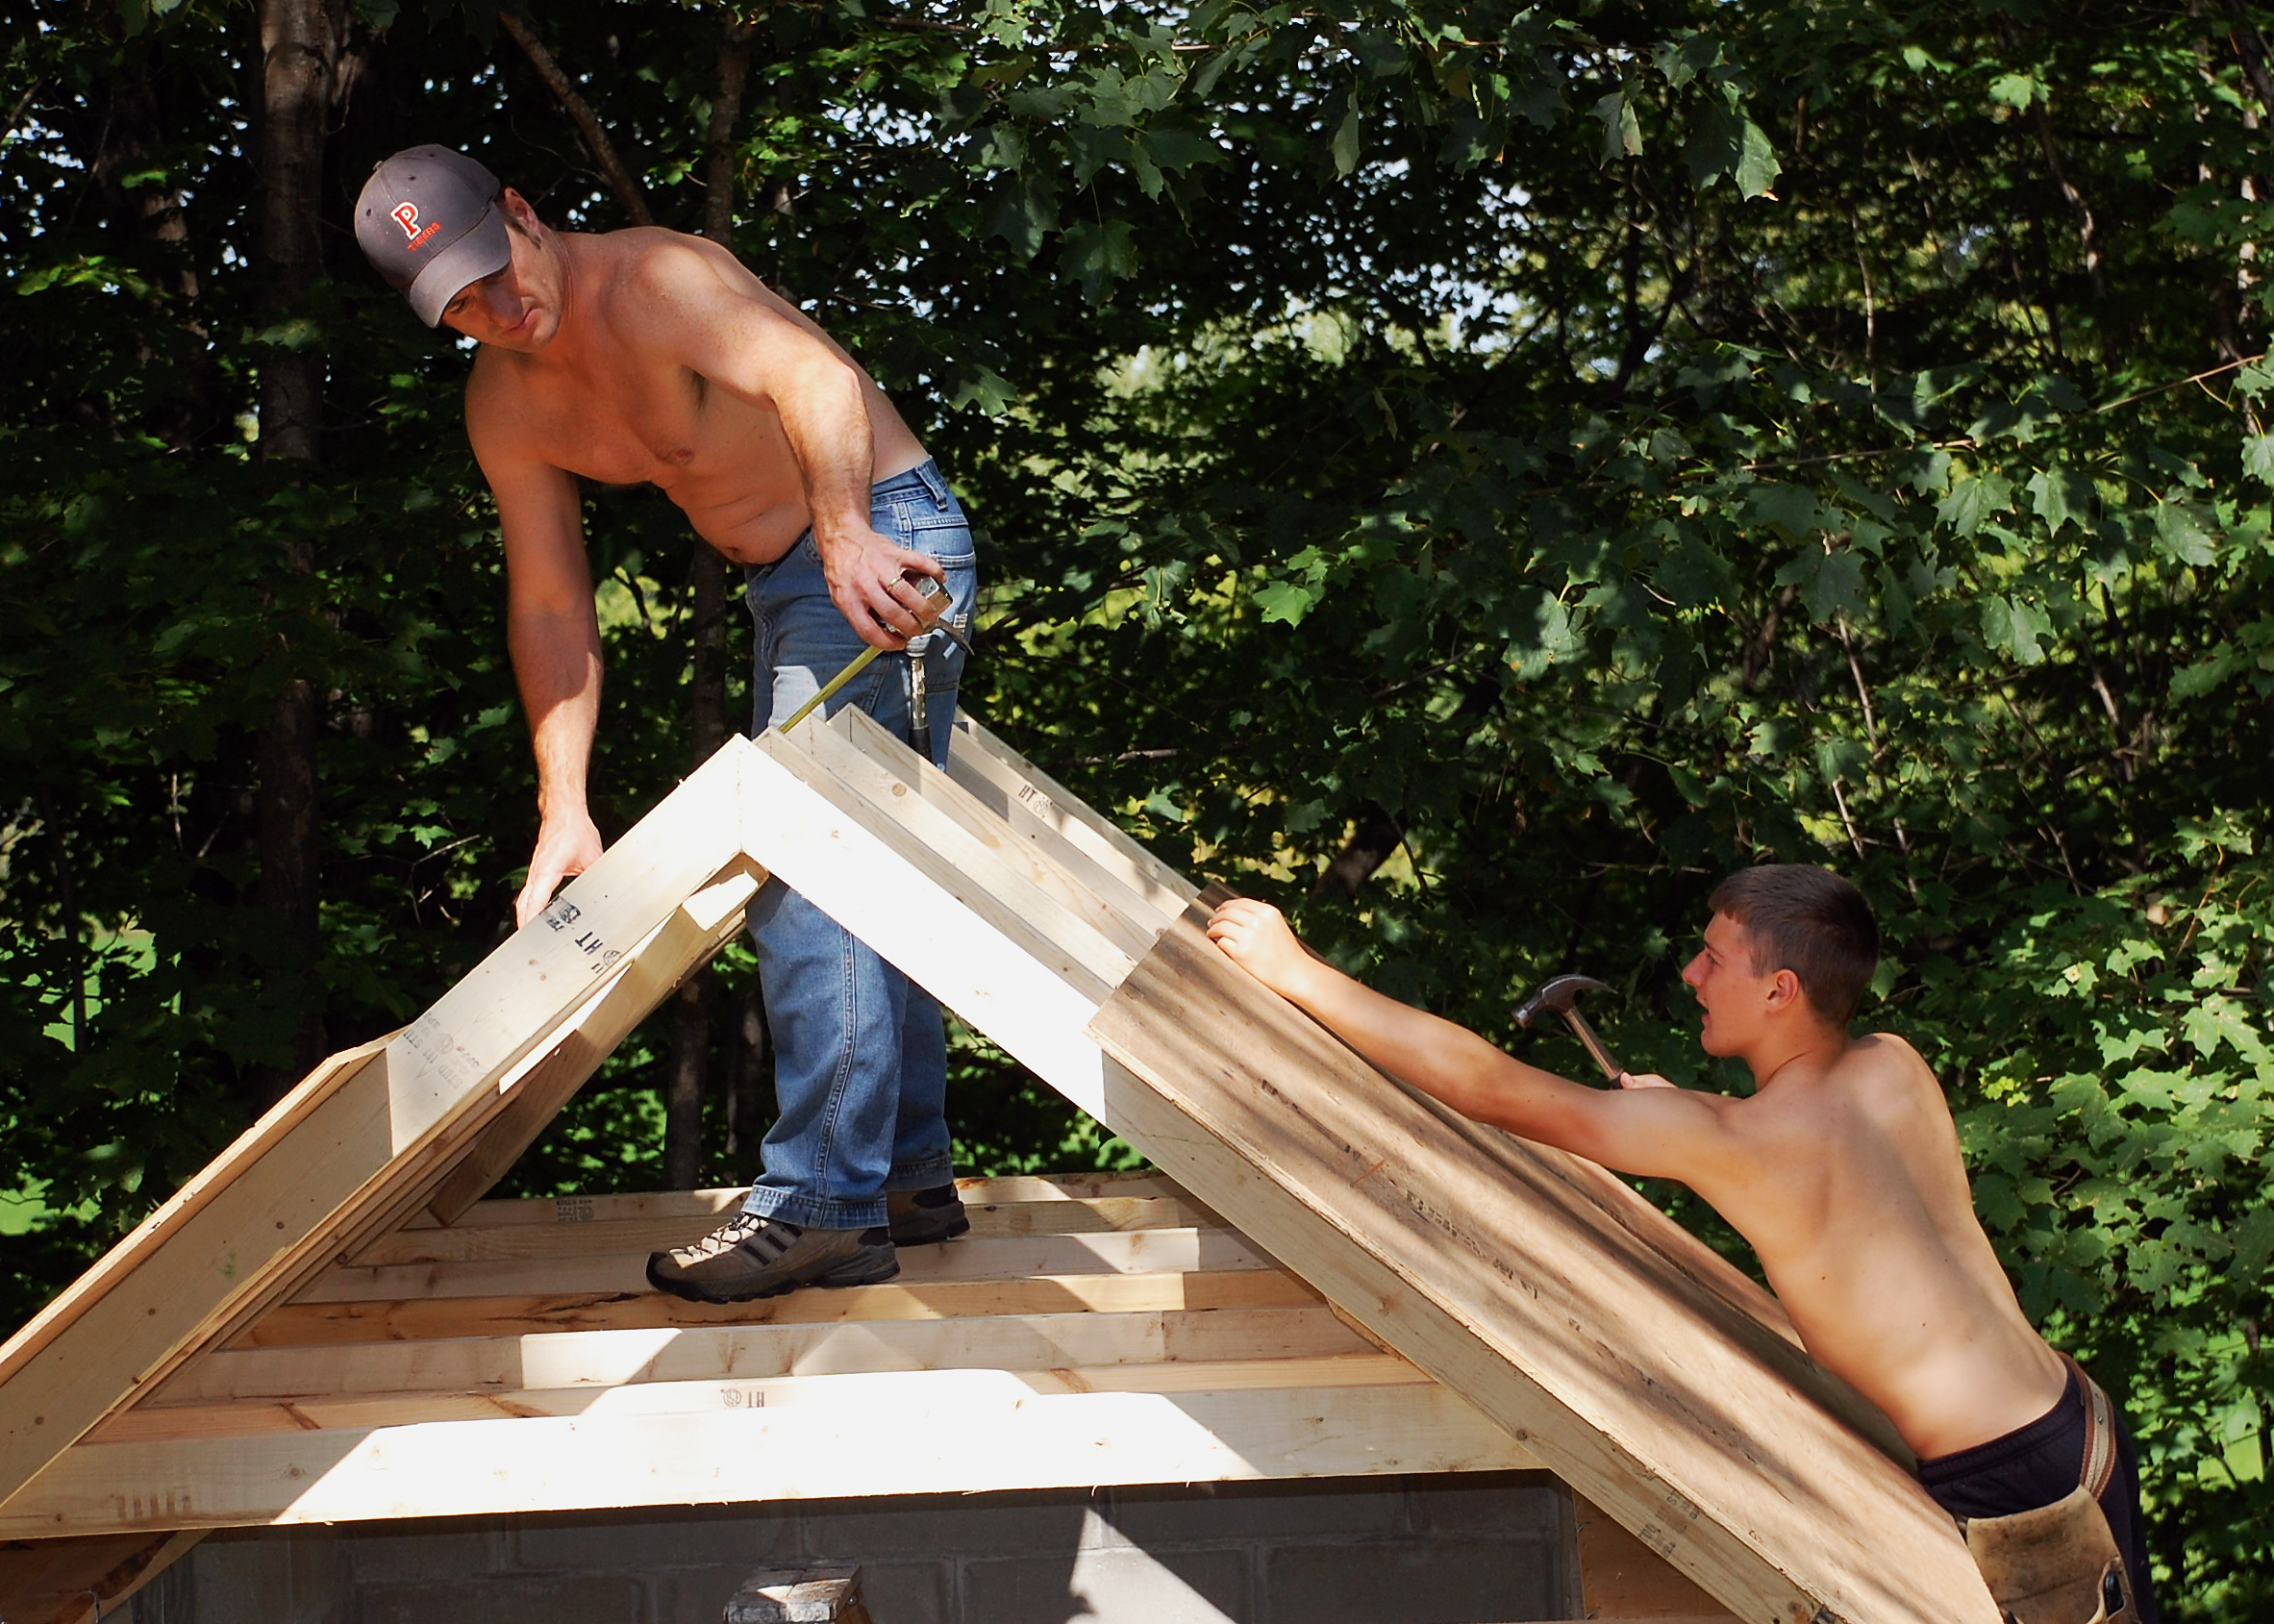
There are vents covered with window screen in the peak at each end of the smokehouse for draft. Jesse had built elaborate hinged doors for adjusting the draft level if needed. However, the correct draft position turned out to be full open.
Firebox
The firebox for a cold smokehouse is located away from the smokehouse to allow the smoke to cool before entering the smokehouse. The smoke from our firebox increases the temperature in the smokehouse a mere 5 to 10 deg F. This allows Jesse to safely cold smoke on days as warm as 60 degrees, but he prefers to have the outside temperature around 30 – 40 degrees.
The tricky part for the firebox is that in order to have adequate draft for the smoke to enter the smokehouse, the firebox should be located about 10 – 12 inches below the smokehouse floor and 8 – 10 feet from the center hole in the smokehouse. So the only logical way to build this operation is to locate the smokehouse on a hill or slope with enough fall to allow access to the firebox.
The firebox can be made from concrete and firebrick with a sliding steel door, but Jesse chose to use an actual home fireplace insert that someone had discarded into a road ditch. With the air intake vent controls on the fireplace he figured that he could control the fire for smoking to just the right levels (and it works perfect). He dug a hole into the side of the hill for the fireplace, and left enough room for about 2 – 3 inches of sewer rock around the fireplace to assist in water drainage. With the heavy gauge steel, the fireplace insert should last longer than our lifetime before it rusts out. It weighed about 5oo pounds and had to be moved into place by a tractor!
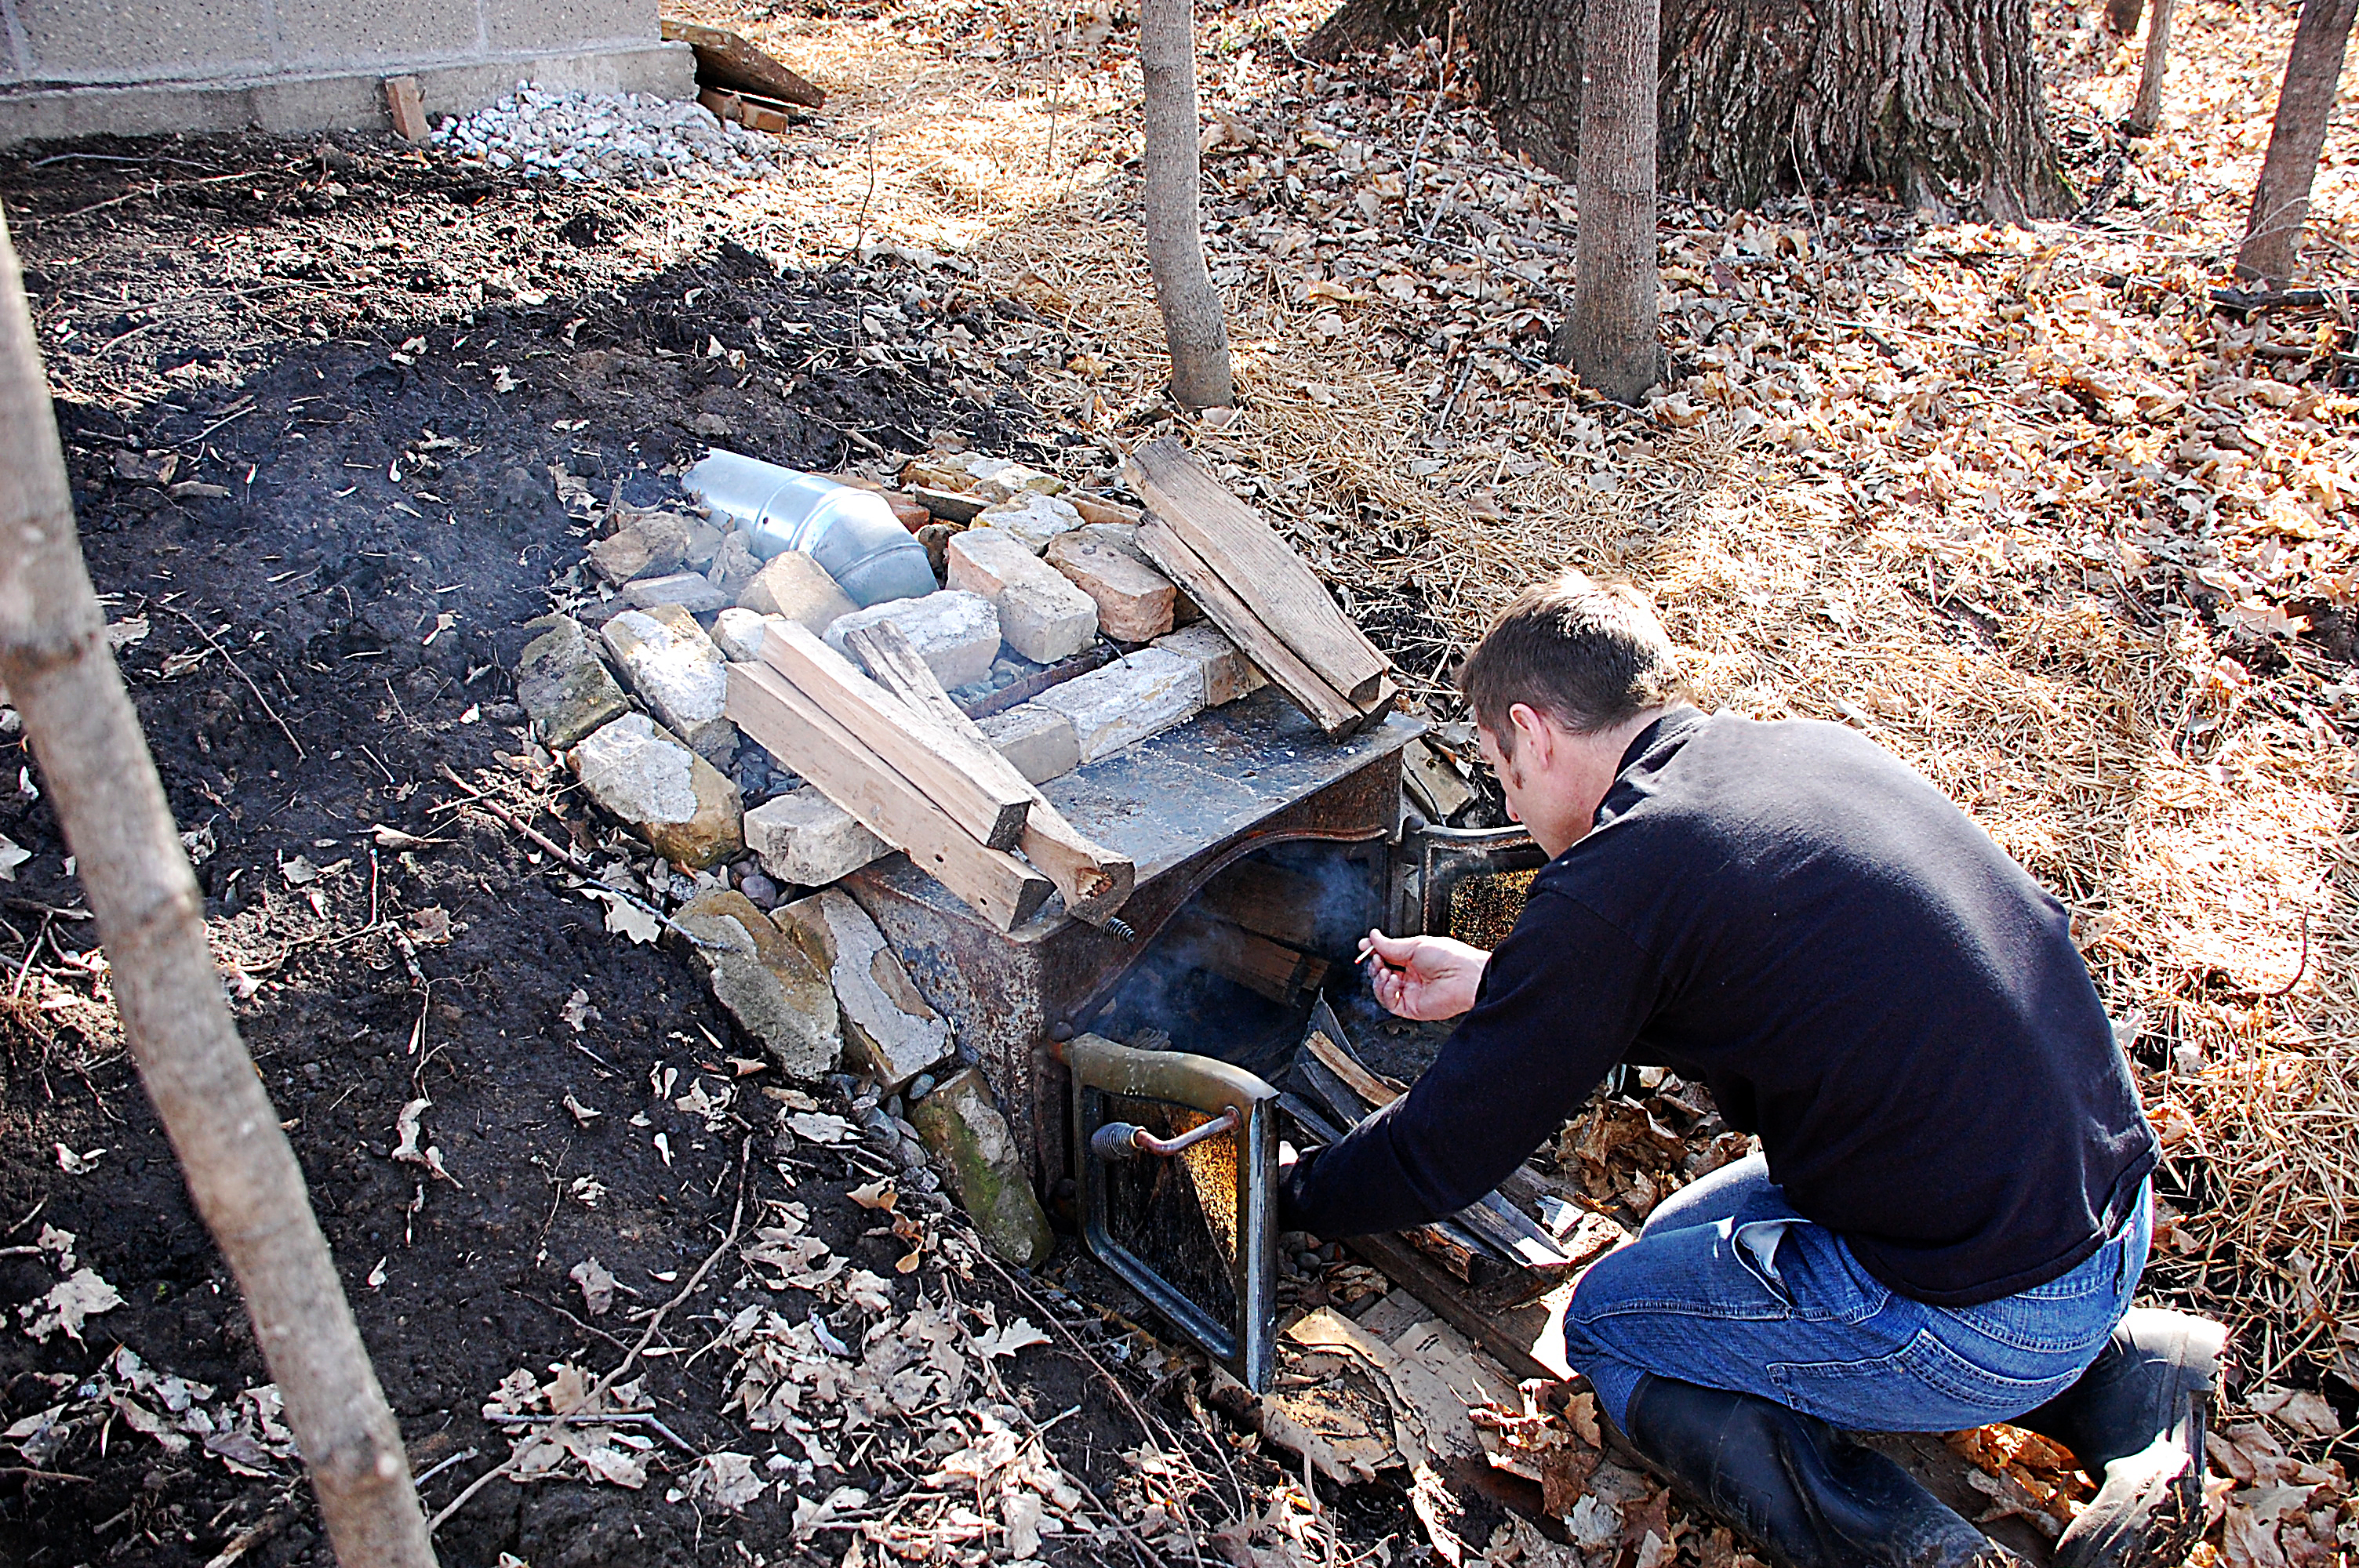
Jesse used 8 inch chimney pipe to connect the firebox to the 5 gallon bucket in the floor of the smokehouse. Obviously you want to install the pipe before you pour the concrete floor. The reason he chose the 8 inch metal chimney pipe was that the firebox had an 8 inch exit, and he needed something that would withstand the heat near the firebox. He says that he would NOT recommend using PVC or other plastic pipe as it may melt or out-gas if heated.
And here is our lovely little smokehouse in action…..
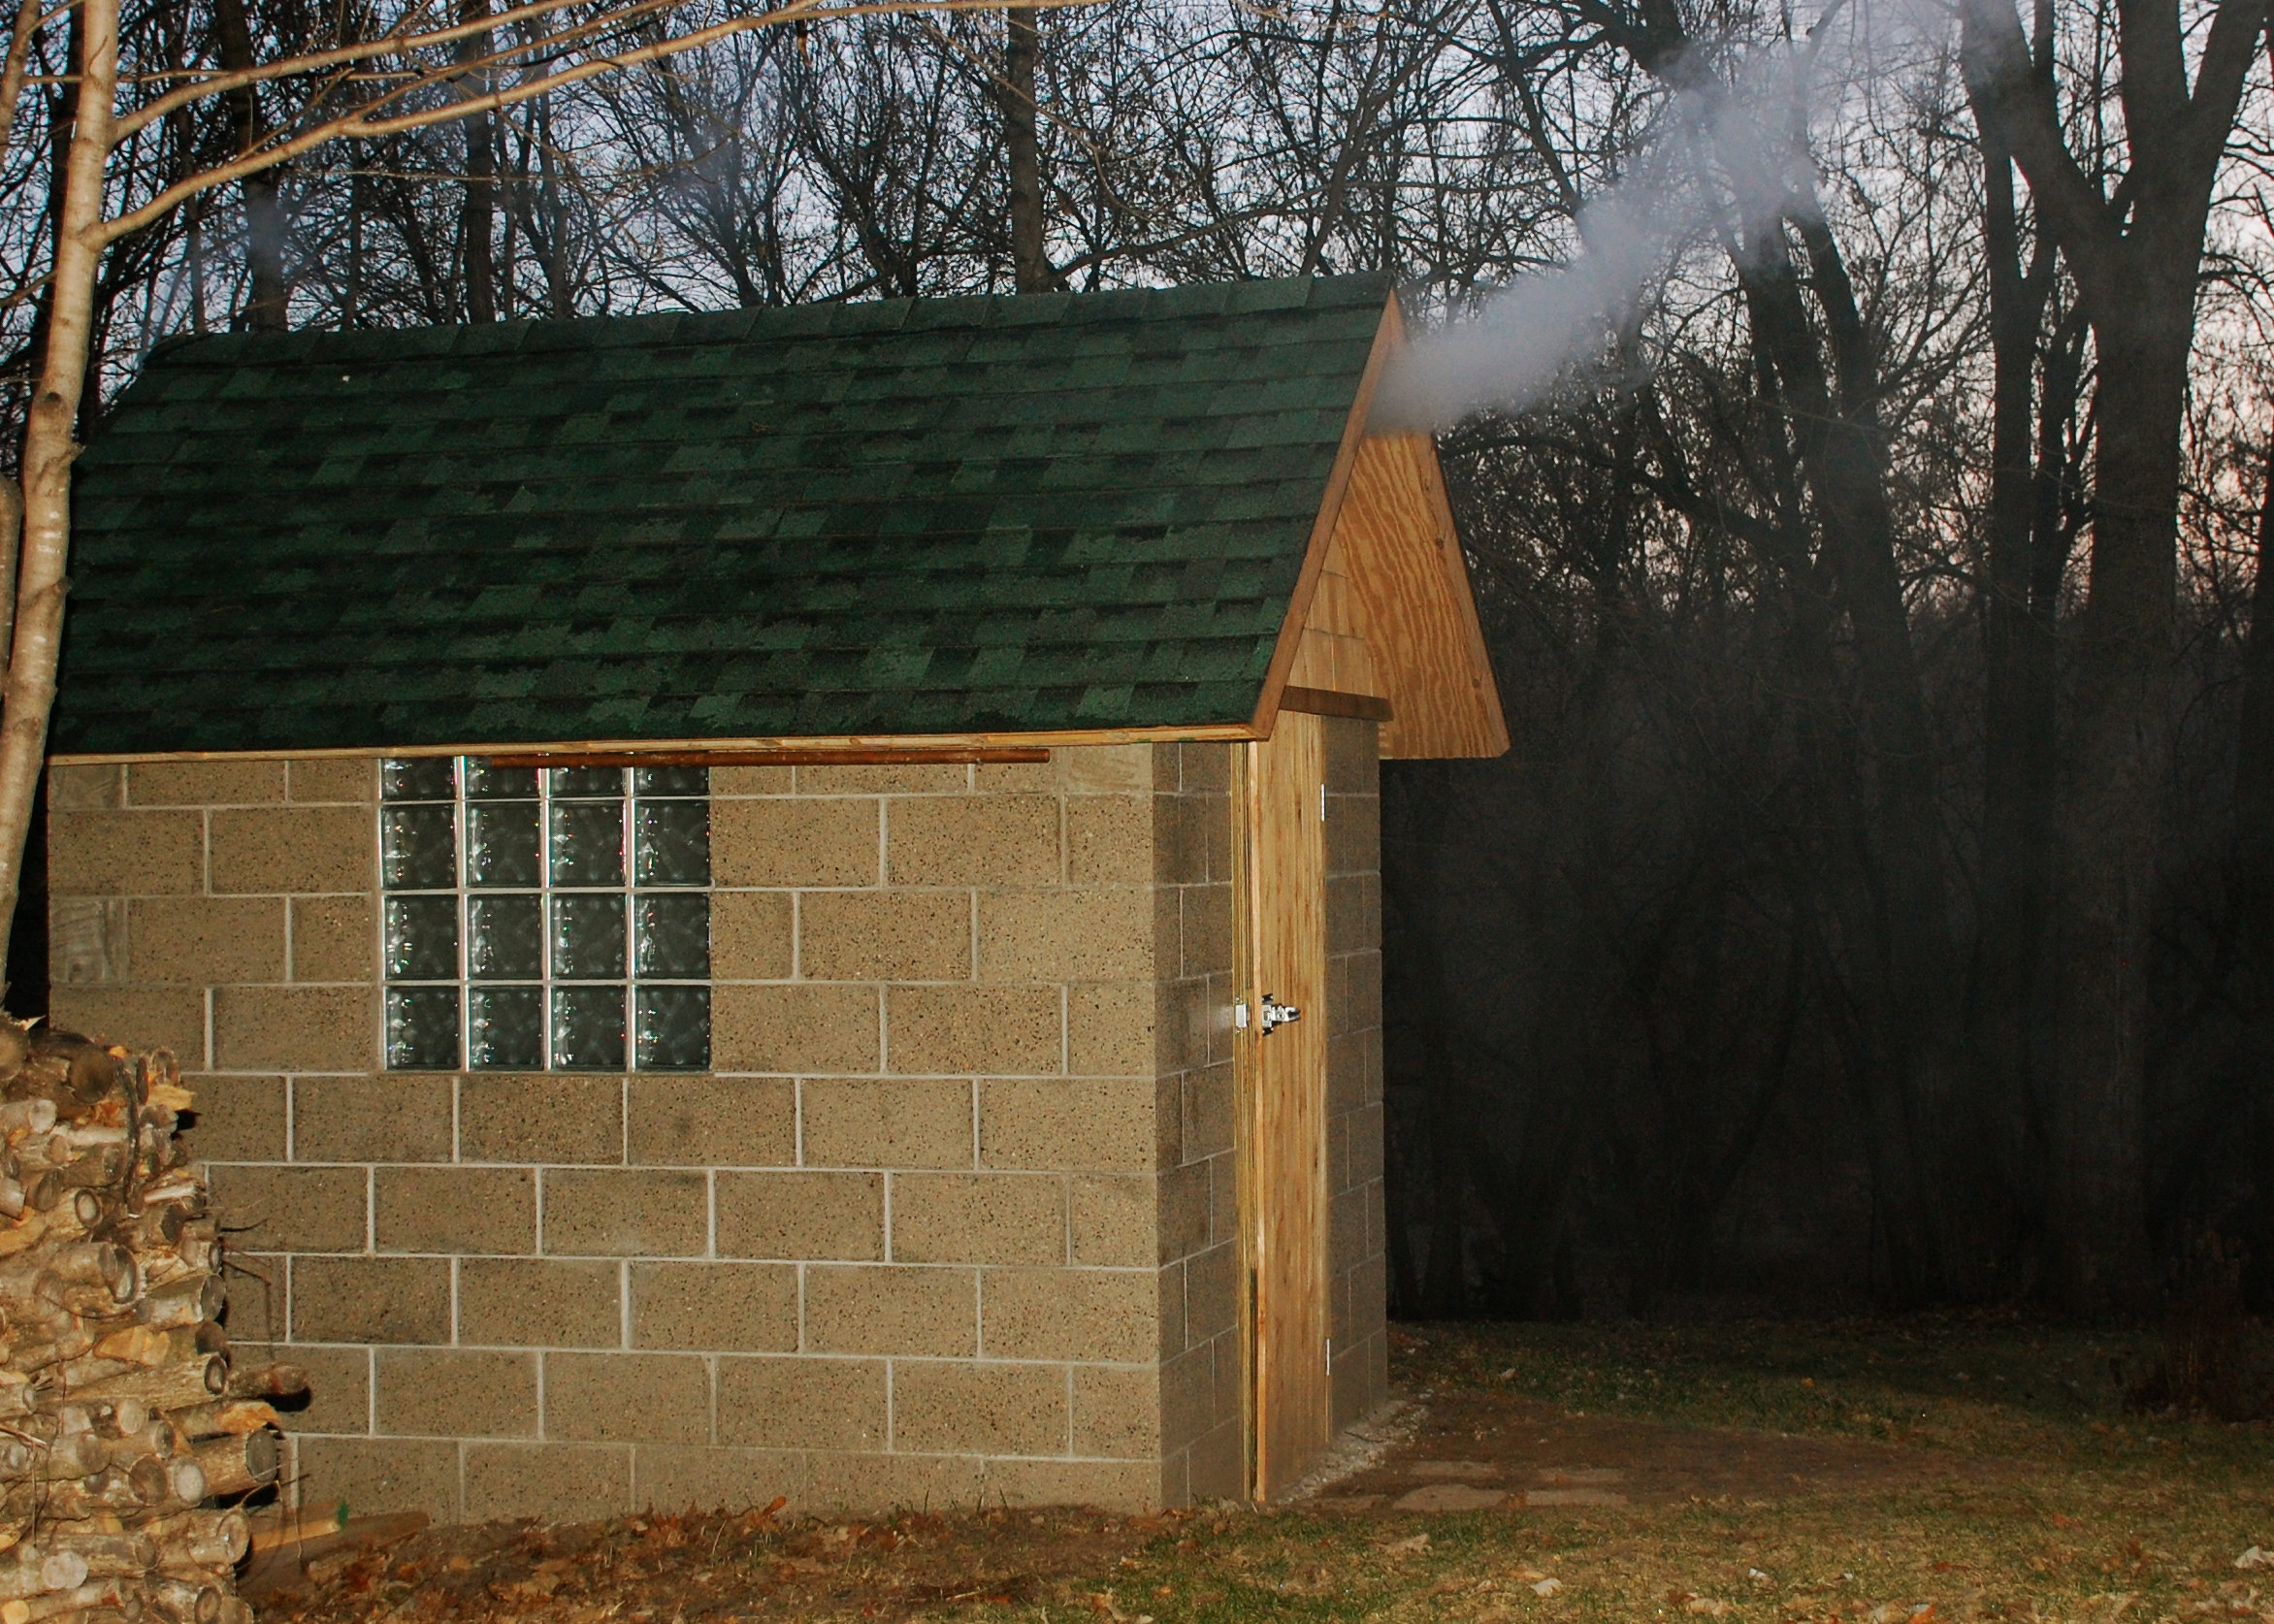
Maybe a bit over-sized for your casual home smoking, but it works GREAT!